How to Change Eye Direction in a Photo
A great portrait where the subject looks slightly off-camera can feel disconnected — or a candid where they should be gazing off-frame feels too posed. With an AI gaze editor you can change eye direction in a photo precisely, in any direction, without touching the rest of the image.
When does changing gaze direction make a photo better?
Eye direction carries the emotional weight of a portrait. Gaze into the lens creates connection — essential for profile photos and headshots. Gaze off-frame creates story and mood — the editorial look. Reshot AI gives you both from a single shot: aim the eyes at the camera for one export, off to the side for another.
Step-by-Step: How to Change Eye Direction in a Photo
- Open your portrait in Reshot AI. Import the photo and tap the face to edit.
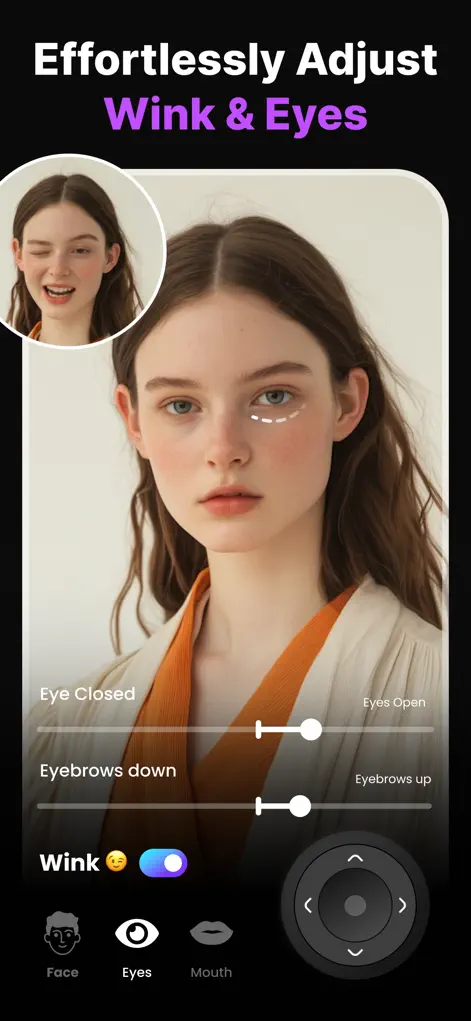
- Enter the Eye Expression Studio. This gives you direction control plus eyelid and eyebrow sliders that shape the overall look of the gaze.
- Move the gaze. Direct the eyes left, right, up, down, or dead-center at the camera. The AI renders the iris, whites, and catchlights consistently with the photo's lighting.
- Fine-tune the expression around the eyes. A slight eyebrow raise or eyelid adjustment can make the new gaze feel intentional. Then export.
Where gaze editing holds up
The more of the eye the AI can see, the better the new gaze looks. A close-up portrait or selfie with open eyes, sharp focus and the face pointing roughly at the camera is the ideal input for Reshot AI.
Results are unreliable, or may not appear, when the face is small in a wide shot, when sunglasses or hair hide the eyes, when the image is blurred, or when the head is turned strongly to one side. Shifting the eyes a short way also looks more convincing than moving them from one corner to the other.
For a bigger change in where someone seems to be looking, turn the head slightly with the Head Pose Adjuster and let the eyes cover the rest.
Choosing a direction that suits the photo
Before moving the eyes, decide what the photo is for:
- Profile pictures, headshots and dating photos: aim straight at the lens so the viewer feels addressed.
- Editorial or moody portraits: look toward the side of the frame with more open space, so the gaze has somewhere to go.
- Photos with another person or an object: point the eyes at it so the picture reads clearly.
- Layouts with text or a product beside the face: look toward what you want viewers to notice.
Checking that both eyes agree
Zoom in before exporting. If one iris sits higher or further over than the other, the result looks cross-eyed or vacant. Back the adjustment off and try a smaller move rather than pushing further.
Try It on Your Own Photo
Expression Editor – Reshot AI is free to download on the App Store. Fix your first photo in under a minute.
⬇ Download Reshot AIFrequently Asked Questions
Can I make the subject look directly at the camera?
Yes — centering the gaze on the lens is the most common use, especially for profile photos and headshots.
Do the edited eyes keep their real color and catchlights?
Yes. The AI regenerates the eyes consistent with the original iris color and the scene's lighting, including natural catchlights.
Can I change gaze for artistic effect, not just correction?
Absolutely — many users export several versions of one portrait with different gazes for different moods.